Showing posts with label log cabin. Show all posts

Thursday, May 29, 2025

Applying Borate Solutions

Technical Tip by Perma-Chink Systems, Inc

Applying Borate Solutions

What is the best way is to apply Shell-Guard RTU, diluted Shell-Guard Concentrate and/or solutions of Armor-Guard? Without a doubt the easiest and most effective way to apply any of these products is with a simple compressed air sprayer, a fancy way of referring to an inexpensive pump-up garden sprayer available at most Do-It-Yourself outlets for less than $20.00. Of course there are some available for a lot more money but they are really not needed for applying borate solutions. A basic pump-up garden sprayer works just fine.
 

What about using an airless sprayer? Airless sprayers put out a fine liquid mist. The droplet size is quite small and is easily carried away with even a slight breeze. In addition, the high surface area of the small droplets allows the water contained in the solution to rapidly evaporate leaving behind a high concentration of borate and mixed glycols. Rather than penetrate into the wood this combination forms a sticky film on the surface of the wood that takes a long time to dry. Not only does this negate the benefit imparted by a borate treatment but unless the sticky film is thoroughly washed off it will interfere with the adhesion of the finish. This can happen even if Shell-Guard RTU is applied with an airless sprayer. With solutions of Armor-Guard the loss of water results in a white coating of borate powder on the surface rather than penetrating into the wood and the white powder will show through our transparent finishes. In other words, don't use an airless sprayer for applying any of our borate preservatives.

For small jobs it's better to use a hand sprayer or a plant mister to apply borate solutions than it is to try and brush them on. Since the viscosity of the solutions is about the same as water it's just about impossible to apply any of them with a brush and not have them run down the wall.

Questions on maintaining the legacy of your wood structure? Give us a call- 1-800-359-6614

Pickup in store - or ship to your door -in whichever woods your cabin dwells.

 Schroeder Log Home Supply, Inc. 

1101 SE 7th Avenue

Grand Rapids MN 55744

1-800-359-6614


Wednesday, May 21, 2025

Log Home Chinking vs Caulking

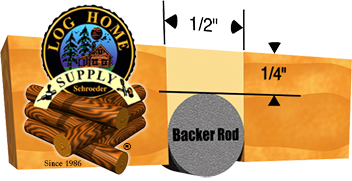
Chinking Joint Design for Log HomesWhat is the difference being caulking and chinking? We hear this question all the time. They are somewhat interchangeable in application- to some degree- but there are differences. Modern caulking and chinking are both flexible sealants that are used to seal log homes. Historically, chinking and daubbing were a myriad of material put between the courses of logs to fill the gaps and keep out the weather. It may have been any combination of mud, manure, straw, horsehair, moss, or whatever the local environment provided. Gradually that was replaced with a mortar mixture, often applied over wire mesh or other hardware to keep it in place as the mortar dried and cracked. Now we have modern, synthetic log home chinking and caulking. When properly applied, these elastic sealants will stretch and move with the wood to maintain a bond and keep water, weather, and pests out of the home and keep the heat inside during winter months. Following its history, modern chinking is a textured sealant that simulates mortar but stretches like caulking and is most often put over a backer rod between the logs. Caulking can also be used to seal the lateral joints of logs when a subtle, non-chinked style is needed, and it’s also used with backer rod to keep water out of log checks and to seal all other gaps around doors, windows, and other spaces.

At Schroeder Log Home Supply Inc., we believe in the importance of using the right product for the job, and that means using quality sealants that are designed to bond and be elastic for the best performance with log and wood. Brands we carry are Big StretchCaulking, CheckMate2, Conceal Textured Caulking, Energy SealCaulking, Log Builder Caulking, Manus-Bond Caulking, WoodsmanCaulking, Log Jam Chinking, Perma-Chink, and Sansin Timber-TecChinking. Contact us to help decide which may be best for your situation, or to get a color card to determine the best match to your wood finish.

Questions on maintaining the legacy of your wood structure? Give us a call- 1-800-359-6614

Pickup in store - or ship to your door -in whichever woods your cabin dwells.

 Schroeder Log Home Supply, Inc. 

1101 SE 7th Avenue

Grand Rapids MN 55744

1-800-359-6614


Tuesday, May 20, 2025

How to Repair Peeled Spots

by Perma-Chink Systems, Inc

We occasionally get calls about repairing spots of finish that have peeled from logs, handrails, etc. In most cases the peeling is associated with checks or small fissures that have opened up after the finish was first applied. When this occurs rain water soaks into the bare wood on ether side of the check and when the sun beats on the area the wood turns to water vapor which has enough force to push the finish right off of the surface. If the peeling is limited to a few small areas, touching them up is not very difficult.

Before we get started on the best way to perform the repairs there is one thing we need to cover. If you have leftover product that's over two years old you need to obtain enough fresh stain and topcoat to accomplish the repairs. Using old product is risky and unnecessary. Give us a call and we'll see if there is anything we can do to help. 

Following are the recommended procedures for touching up peeled areas:

  1. Sand the peeled areas with 60 to 80 grit sandpaper. Do not use a finer grit. We want the stain to have something to grab onto. Be sure to sand off any surrounding stain film that looks like it may have lost its adhesion.
  2. If it's just a few small areas wipe down the sanded spots with a damp rag. For larger spots or multiple areas on a wall it's best to wash the entire wall with a two cups per gallon Log Wash solution. Allow the wall to dry.
  3. If the peeling is associated with checks that are ¼” or more wide, seal them with CheckMate 2 after sanding and cleaning but before staining. This will help make the CheckMate 2 less visible.
  4. Using a rag not a brush, apply one or two coats of stain to the bare wood. You want to apply enough stain to match the color of the surrounding wood. Since the coarse sanded area may be more absorbent than the original surface one coat of stain may be sufficient to match what's already there. Using a rag helps avoid lap marks and gets some stain down into any unsealed checks as well as small cracks and fissures. 

Once the stain has been applied and the color matches the surrounding wood, one or two coats of Advance Topcoat can be applied with a brush or rag. Lap marks are not much of a concern since the Advance is clear and colorless.


Questions on maintaining the legacy of your wood structure? Give us a call- 1-800-359-6614

Pickup in store - or ship to your door -in whichever woods your cabin dwells.

 Schroeder Log Home Supply, Inc. 

1101 SE 7th Avenue

Grand Rapids MN 55744

1-800-359-6614


Friday, May 16, 2025

Avoiding Metallic Surface Contamination

by Perma-Chink Systems, Inc

Although we emphasize the importance of cleaning the surface prior to the application of our finishes there are some types of surface contaminates that can be very difficult or even impossible to remove with just a light washing. The leading cause of dark discolorations appearing under any transparent finish like LIFELINE is the presence of minute metal particles imbedded in the surface of the wood. All wood contains tannic acid and when tannic acid comes to the surface it can react with these metal particles creating dark discolorations. There is much about this process that we have yet to understand but there are some things that we do know. The first is that the application of chlorine bleach not only accelerates but in many cases initiates this process. The second is that direct sunlight intensifies the discolorations. That's why the south and west walls are typically (but not always) more prone to discolorations than the north and east walls. The third is that areas of the log that cut through heartwood are usually worse than exposed sapwood. This makes sense since heartwood contains a higher concentration of tannic acid than sapwood.
 

The Origin of Metallic Contamination
Milling, Planning and Shaping

All logs and siding used in a log home go through some type of process to remove the bark, cambium and branches and to shape the wood. No matter what process is used, be it milling, planing, draw knifing or even hand hewing, some type of steel blade is involved. Although you may not be able to see them, microscopic particles of steel are deposited on the surface as the blade or blades cut through the wood. If the blades on a milling machine for example get dull, many times more particles of steel will shear off as opposed to when the blades are sharp.


Using the Wrong Materials

Using wire brushes, steel wool or metallic abrasives to help remove old finishes or smooth the surface will definitely create discoloration problems. Small bits of metal will be deposited on the wood and their use should be avoided at all costs.

Sandpaper and Sanding Pads

Although the use of most sandpaper and sanding pads present no risk to the formation of discolorations, it is not out of the realm of possibility for them to be a source of metal contamination, especially if they have been previously used. Let's say a sanding belt was used to remove rust from a steel plate and then used again on a log home. Thousands of small metallic particles will be forced into the wood fibers. The same thing can happen if a sander or sanding disk goes over a nail or screw during the course of sanding a wall. The metal contamination will then be spread over a wide area. We also believe that there are some types or brands of sandpaper that may contain metallic particles along with the abrasives but at this time we have not specifically identified them.


Contaminated Blasting Media

Blasting media like crushed glass is very abrasive and since it maintains its abrasiveness even after being used, some people try to reclaim and reuse it several times. If done once or twice it usually does not present a problem but when reused multiple times it can become contaminated with metal picked up as it flowed through the blaster pot, valves and connections. It can also pick up contamination from the ground when it is reclaimed.


Installation of Steel Roofs and Other Metal Components

You can easily envision the amount of metallic dust and particles generated by cutting or sawing steel roof panels. They may well end up on the surface of your logs or even more likely, your deck. If they are not completely washed away they will become a source of discolorations. Fortunately we have never seen any discolorations associated with particles of aluminum. But any metal that contains iron has the potential for creating dark discolorations.


Preventing Discolorations Due to Contamination

The best way of preventing metallic tannate discolorations is to avoid contaminating the surface in the first place but in the case of metallic particles deposited during the shaping process that's impossible. Wood surfaces should always be thoroughly cleaned with Log Wash, or in the case of milled log siding, Wood ReNew before the first coat of finish is applied.


Steps to Take to Avoid Metallic Contamination:

  • Never use a wire brush or steel wood on a wood surface that's going to be finished.
  • Use good quality sandpaper and sanding pads and never use any that have been previously used for another purpose. Store them separately in plastic bags and don't allow the abrasive side to contact any metal prior to use.
  • If during sanding you run over a nail or screw discard the paper or pad.
  • Do not attempt to reuse blasting media more than two to three times and avoid picking up dirt or other contaminates as you reclaim it.
  • Wood surfaces should always be thoroughly cleaned with Log Wash or Wood ReNew before the first coat of finish is applied. 

Questions on maintaining the legacy of your wood structure? Give us a call- 1-800-359-6614

Pickup in store - or ship to your door -in whichever woods your cabin dwells.

 Schroeder Log Home Supply, Inc. 

1101 SE 7th Avenue

Grand Rapids MN 55744

1-800-359-6614


Friday, May 2, 2025

Great Lakes Log Crafters Association Meeting in Land O’ Lakes, WI

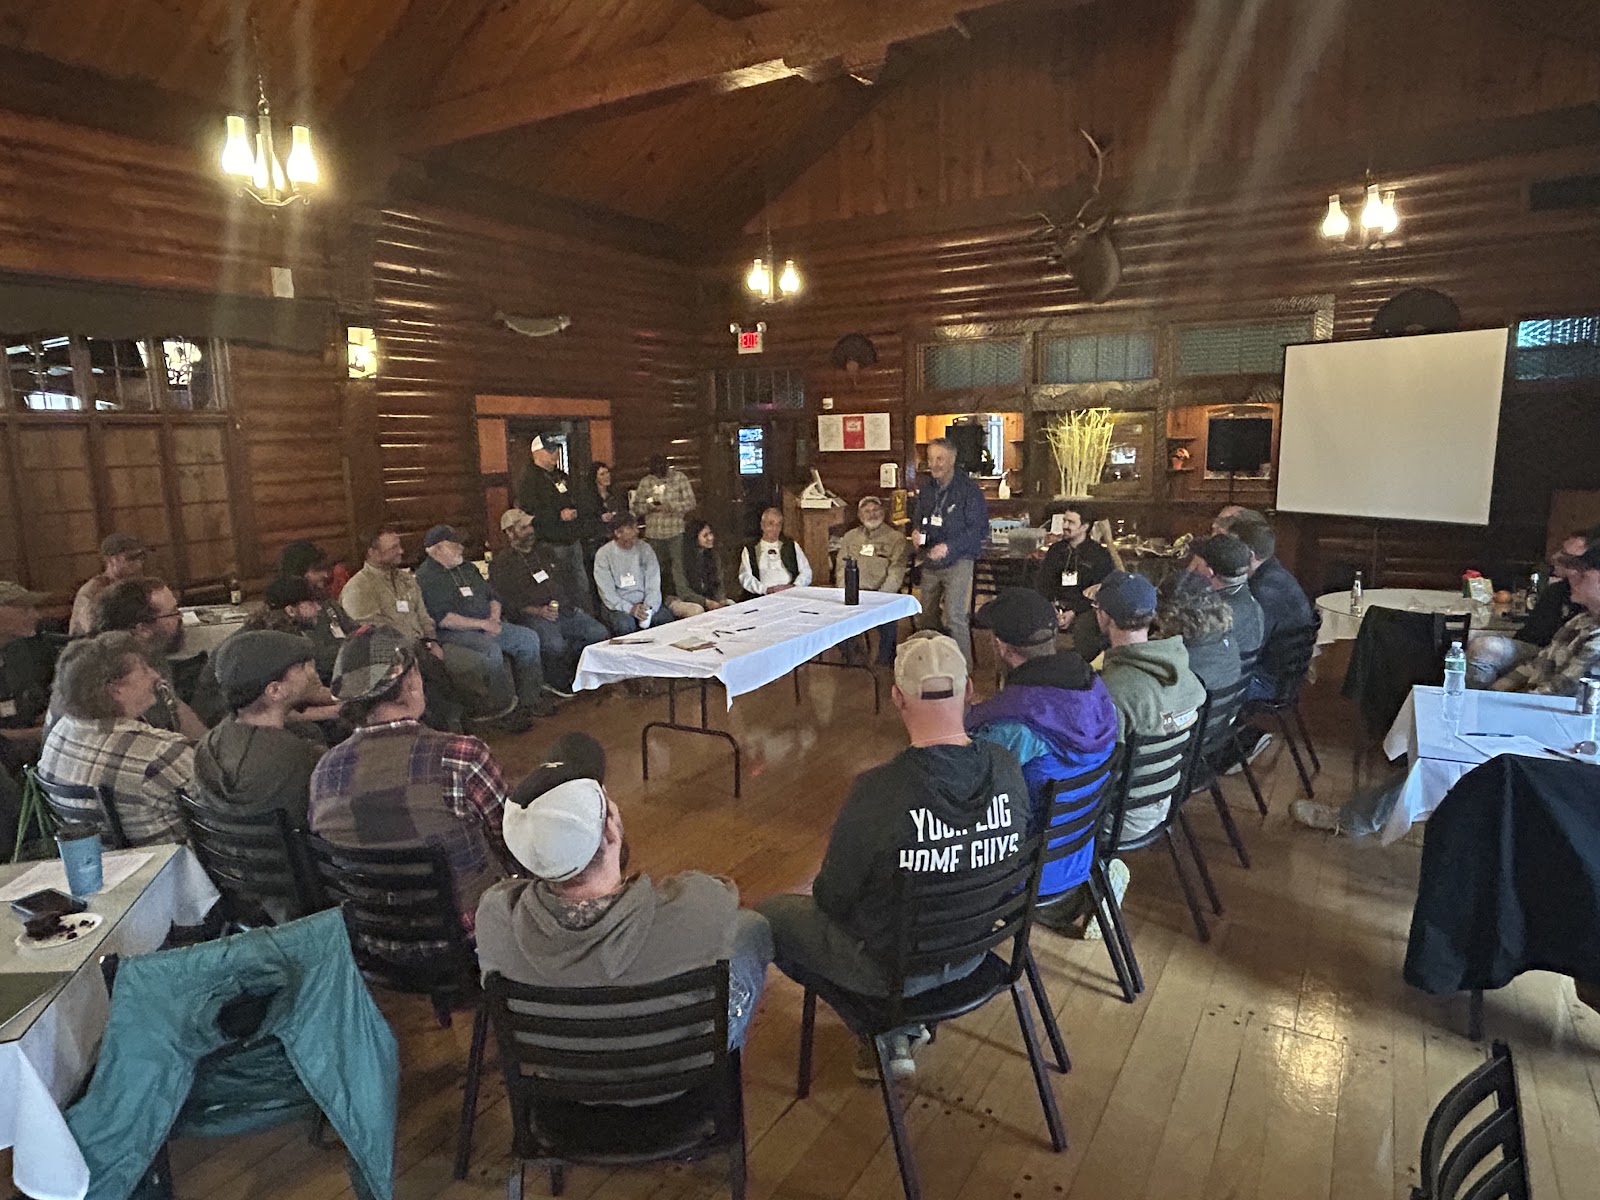
April 25-26, 2025 members of Great Lakes Log Crafters Association met in Land O’ Lakes, Wisconsin. GLLCA members Dan and Mary Wait of Frontier Builders, Inc, assembled a great list of speakers speakers talking about Epitome Composite Foundations, Wood treating with Booge, H Windows, Building Codes, and insurance issues impacting construction/manufacturing sectors.

The most interesting topic, was Robotic Solutions, Inc. providing software for log and timber manufacturing industry and ABB Robot Demonstration: Design to Log Panels. Of course a group of handcrafted log professionals were certain to have varying opinions on using robotics in handcrafted log building, but the presentations were informative and interesting for all.

While the robotic portion of the conference was in Frontier Builders, Inc., yard, most of the speakers and conference events were held at the historic Gateway Lodge in a nostalgic timber structure that dates to the 1930’s. The annual conference typically rotates between locations in Minnesota, Wisconsin, and Michigan every year, but at the annual meeting the consensus was to return again to the Gateway Lodge for the 2026 conference. An educational fundraising build to jointly use robotics and handcrafted techniques is being discussed to explore how old and new technologies can be used together in the name of crafting logs. Find more information at www.gllca.org

Questions on maintaining the legacy of your wood structure? Give us a call- 1-800-359-6614

Pickup in store - or ship to your door -in whichever woods your cabin dwells.

 Schroeder Log Home Supply, Inc. 

1101 SE 7th Avenue

Grand Rapids MN 55744

1-800-359-6614

Wednesday, April 30, 2025

Capture Log Stain - New Colors!


Three new colors for Capture Log Stain have been introduced in 2025. Aspen Bark, Gunstock Brown, and Smoked Hickory.

Capture Log Stain by Sashco is a log finish that is extremely effective and attractive semi-transparent stain that is followed by a weather repellent topcoat, Cascade. Capture Log Stain and Cascade work together. Both are freeze-thaw stable in their containers through at least 5 freeze-thaw cycles (freezing in the container, rethawing, then freezing again, etc.) Modest sheen gives "depth" to the appearance of logs (when used in conjunction with the Cascade clear topcoat). Capture Log Stain’s unique elastic formula allows it to move freely as your logs move, instead of cracking and peeling. Two heavy coats of Capture Log Stain are now recommended, especially for Autumn Aspen, Bronze Pine, Natural, Wheat, and other light colors. Capture also works well by itself as a one coat interior stain or can be top-coated with Symphony. Capture Log Stain and Cascade are compatible with other Sashco products like PeneTreat (Tim-bor), Conceal, Log Builder Caulking, and Log Jam Chinking. Made in the USA. Capture Log Stain Application Instructions PDF Capture Log Stain Technical Data | Capture Log Stain MSDS PDF SDS | Paint Care Notice  


Questions on maintaining the legacy of your wood structure? Give us a call- 1-800-359-6614

Pickup in store - or ship to your door -in whichever woods your cabin dwells.

 Schroeder Log Home Supply, Inc. 

1101 SE 7th Avenue

Grand Rapids MN 55744

1-800-359-6614

Tuesday, April 15, 2025

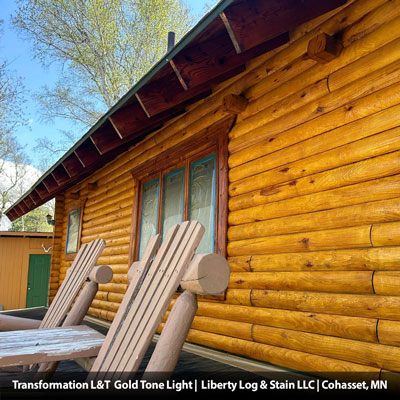
Transformation Log & Timber Faster Dry Formula and New Colors


New from Sashco:

Jim the Stain Guy (aka the Senior Chemist in charge of stains) put several years of work into this improved Transformation Log & Timber formula to speed up the dry time so that the second coat can now be applied the next day, rather than waiting 24-48 hours. Two separate field tests with product applied to 18 different homes and in a variety of weather and humidity conditions confirm this. Those field testers and Sashco are confident that this new formula will improve jobsite turn times and reduce labor costs.
Updated formula pails have a green sticker on them.


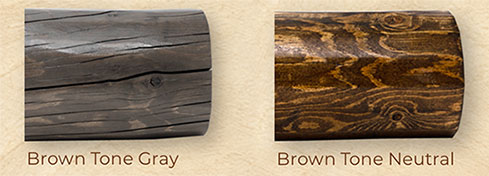
Transformation Log & Timber New Colors:

 Brown Tone Gray

Finally! A gray for Transformation. Beautiful antiqued look, wonderfully modern protection. 

Brown Tone Neutral

Free of yellow and red undertones, but still with the Transformation Log & Timber gorgeous gloss and
transparency.


Questions on maintaining the legacy of your wood structure? Give us a call- 1-800-359-6614

Pickup in store - or ship to your door -in whichever woods your cabin dwells.

 Schroeder Log Home Supply, Inc. 

1101 SE 7th Avenue

Grand Rapids MN 55744

1-800-359-6614


Friday, March 28, 2025

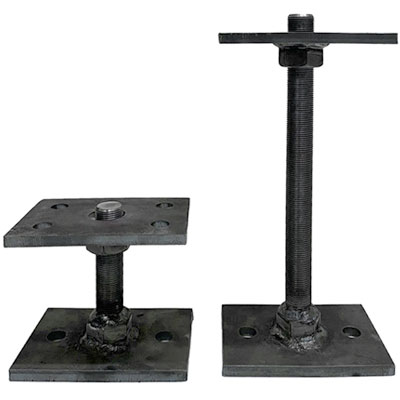
The Great Lakes Jack

We are excited to introduce the Great Lakes Jack.The Great Lakes Jack was jointly designed by members of the Great Lakes Log Crafters Association, along with Aeshe Engineering. The Great Lakes Jack has a 1” threaded rod mounted to a 3/8” steel plate with a nut acting as the height adjuster, and another 3/8” steel plate welded on top of the nut. The bottom plate of the screw jack is anchored to the foundation through two 1/2" holes. The top plate is anchored to the bottom of the vertical log post with four 3/8" structural screws. The threaded rod passes through a hole in the center of the top plate as shown and into a pre-drilled recess in the log. Unlike other settling jack designs, the nut is welded to the top plate of the Great Lakes Jack. This aids in resisting uplift, but as such it's necessary to remove the anchor screws from the upper plate while vertical adjustments are made. Corrosion resistant coating should be applied before installation. Allowable net uplift is 900LBS, and Vertical downward force is tested to 20,000LBS.

A portion of proceeds from this jack go to the Great Lakes Log Crafters Association and help to fund their education and promotion of excellence in handcrafted log building. The Great Lakes Log Crafters Association meets annually for education, demonstration, and camaraderie of all things related to log craft. In 2025, the conference will be meeting April 25-26 at Gateway Lodge in Land O’ Lakes Wisconsin. Some of the many topics presented will be Net Zero Log Home: Purdue University Ross Reserve; Stihl Chainsaw and Milwaukee Tool Demonstrations; Wood Treating With Lake Country Log and Cedar; Wisconsin Building Codes; and Robotic Solutions, Inc- Software for log and timber manufacturing demonstration. Registration is open to all members and non-members who are interested in learning more about all aspects in the craft of log construction.


Questions on maintaining the legacy of your wood structure? Give us a call- 1-800-359-6614

Pickup in store - or ship to your door -in whichever woods your cabin dwells.

 Schroeder Log Home Supply, Inc. 

1101 SE 7th Avenue

Grand Rapids MN 55744

1-800-359-6614


Thursday, August 15, 2024

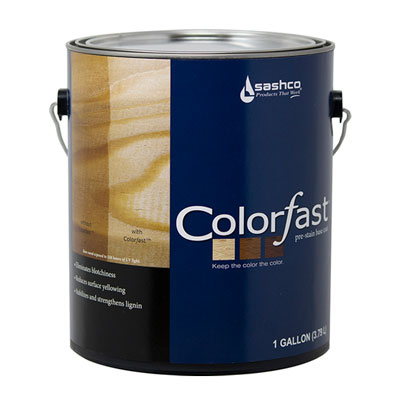
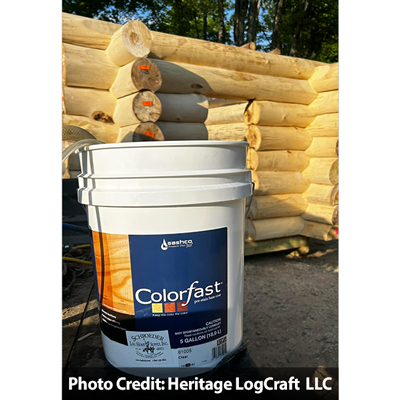
Applying Sashco Colorfast

Colorfast Pre-Stain Base Coat

 Everyone knows that color is king on a log home stain job, but pleasing the king can be difficult! Wood porosity differences lead to blotchy, uneven results when staining. UV damage causes the wood to yellow your stain or interior clear coat. That once-perfect color is lost. That’s why you need Sashco’s Colorfast. Colorfast strengthens the glue that binds the wood cells together, called lignin, preventing yellowing of the underlying wood cells to help maintain a consistent color year after year. Before staining, Colorfast evens out wood porosity, creating a smoother surface for stain application and preventing over-absorption and a too-dark color. After staining, the lignin stabilizers prevent the wood underneath from getting sunburned, leaving the stain or clear coat applied on top looking the same year after year. It’s color confidence for your log home. Color: Goes on milky white. Dries clear.

Why use Colorfast™?

• Keeps the color the color: Lignin (wood cell glue) stabilizers prevent yellowing and darkening of the wood itself overtime, which in turn prevent color shifts in the stain applied over top. Light colors stay light and darker colors don’t shift too dark.

• Reduces blotchiness: Fills pores for a smoother surface and more even stain application. Great for blasted, rough-sawn, knotty pine, or milled logs.

• Prevents picture-frame effect on interior wood: Apply on bare wood on the interior of the home and under Sashco’s Symphony ® interior clear coat to avoid yellowing around wall décor.

• Use under any Sashco stain: Using oil-based Transformation Log & Timber? Water-based Capture®, Cascade®, or Symphony® ? No problem.

• Easier stain application: Greatly reduces the need to back-
brush the stain applied over top.

• Great as a log keeper coat: Prevents mold and yellowing due to UV damage on new wood as it moves from the mill to the job site and throughout construction. Contains both mildewcide and algaecide to help preserve the wood until it’s time to stain. Or, life happened and you need to wait for a few weeks between prep and staining? No problem.

• Seal those ends: When applied heavily on log ends, prevents over-penetration of stain and log ends that are darker than the rest of the logs. 

Application Instructions

Exterior Application Instructions

Proper substrate preparation and product application mean greater longevity, a better color, and better long-term performance. Read this full Colorfast™ Info Sheet before applying any product and call Sashco at 800-767-5656 with any project-specific questions.


1. Make sure it sticks: If you are changing from one stain product to another, contact us first. Colorfast™ will adhere to almost any surface that is properly prepped. Any product already on the wood, and especially those that contains waxes, non-drying oils, or silicones, will interfere with the adhesion and penetration of Colorfast™ and must be removed before the product is applied.

2. Clean the surface: Media blast, power wash, or sand wood surfaces using an Osborn ® brush or 60 to 80 grit sandpaper to remove all previous stains and loose, unsound gray or yellow wood fibers, along with mill glaze, pollen, and other surface contaminants. This creates the best surface for Colorfast™ penetration and stain longevity. If mold or algae is present, apply Sashco’s CPR ® in the brightener strength according to the directions or apply fresh bleach in a 4 parts water to 1 part bleach solution. Allow it to sit no more than 20 minutes, then thoroughly rinse. If necessary, use a chemical remover. (Follow label instructions carefully and ensure wood is back to neutral pH, checking with pH strips.)

3. Remove fuzz: For best appearance, remove felting (wood fuzz) with Osborn® brushes, Sashco’s Buffy Pad system or 60 to 80 grit sandpaper once the wood is dry. Remove all sawdust with a broom, compressed air, or a leaf blower, or rinse with water.

4. Apply preservatives: Apply Tim-bor ® according to directions for protection against wood rot and wood-ingesting insects BEFORE Colorfast™ is applied. Allow wood to dry 1–3 days, until wood is at or below 19% moisture content level. (Use a moisture meter to check!) 

5. Timing matters: UV rays from the sun can damage the wood you just worked so hard to prep in as little as 1 week; therefore, Colorfast™ should be applied as soon as possible after wood prep is complete. If cold or rainy weather threaten or delay your staining project, you may apply Colorfast™ and wait up to 8 weeks to apply stain. The mildewcide, algaecide, and lignin stabilizers in Colorfast™ will keep your wood protected during that time. (Score!) Be sure to clean off surface contaminants before staining. If any further sanding prep is needed, remember to reapply Colorfast™ to freshly sanded areas before staining for a consistent finish. 

6. Air and surface temperatures matter: Plan to apply Colorfast™ when air and surface temps are between 40°– 90°F (4°– 32°C). Use an infrared thermometer to check surface temps. Temps that are
too hot dry Colorfast™ too quickly, preventing proper penetration. Temps that are too cold will freeze Colorfast™, preventing both proper penetration and proper curing. 

7. Don’t get caught out in the rain: While Colorfast™ can be stained over as soon as it’s dry to the touch (usually in 2 hours or less). Full cure takes longer. A heavy rain could wash off both Colorfast™ and any stains applied over top, requiring extensive prep to remove the mess and reapplication of the product. Avoid rain both on the day of application and for a full 24 hours afterwards. You may also plan to cover surfaces if rain is expected.

8. Wood must be dry: Use a moisture meter to make sure wood is at or below 19% moisture content level before applying Colorfast™. Damp wood can prevent Colorfast™ from penetrating properly and also increases the risk of water stains, rot, and peeling stain. 

9. Mix it up: Thoroughly mix Colorfast™ with a drill-driven, squirrel-cage type mixer. Scrape any settled material off the bottom of the pail and thoroughly mix it in. Stir Colorfast™ every 15–20 minutes throughout application to ensure all ingredients are always mixed in.

10. Spray it on: Using a large (515+) spray tip on an airless sprayer, apply on one heavy coat of  Colorfast™, covering all the wood and inside cracks and checks. If only a brush is used, be sure to drench-apply Colorfast™ to ensure adequate coverage. Don’t skimp. Colorfast™ goes on milky white, but don’t worry: it dries clear.

11. Lightly back-brush: Using a block brush on a pole, lightly brush out Colorfast™ to make sure all the bare wood gets covered, to catch drips, and to coat the insides of every crack and check. Colorfast™ will soak into the wood completely, so don’t worry about foaming. Any areas that remain wet (white) after 10 minutes should be brushed into drier areas.

12. Dry time: Allow Colorfast™ to dry until clear before applying the final stain over it. Often, this is within 2 hours, but check cracks and checks where it may take longer. 13. Apply stain: Once dry, apply two coats of Sashco’s Capture ®, Transformation Log & Timber, or Transformation Siding & Trim. No matter which stain you use, the first coat will go further, will not penetrate as much, will not require vigorous back-brushing, and will be lighter in color than normal. This is OK! It means that Colorfast™ is working as designed. 

* Do not apply Colorfast™ to fiber cement, concrete, or other cementitious materials.

Interior Application Instructions:

Interior prep is not as intense: Surfaces must still be clean and free of contaminants and loose wood fibers, but media blasting and power washing aren’t required except in extraordinary circumstances (like the home was flooded or was in a fire). A general rule of thumb on interior wood is to prep the wood the
way you want it to feel when finished. On the interior, smoother wood is best and usually desired.

Spray it: Apply Colorfast™ the same way you would on exterior wood. Be aware that Colorfast™ will go further on smooth, less porous interior wood.

Stain it: Cover Colorfast™ with 1–2 coats of Sashco’s Symphony ® interior clear coat for easier cleaning, to maintain the original bright wood color, and add a beautiful satin or gloss sheen. Colorfast™ is formulated to prevent interior wood from yellowing. Hooray! If a color is desired, apply 1 coat of Sashco’s Capture®, or Transformation Siding & Trim in the color of your choice, followed by 1–2 coats of Symphony ®. Download the Symphony ® application instructions at sashco.com/log-home. 
Colorfast Pre-Stain Base Coat
Sashco Colorfast Pre-Stain

What’s Really Important

It is well known by painters and stainers everywhere that the single most important factor in the longevity of any staining or painting job is the quality of the prep done beforehand. Clean, sound, warm, dry, and textured wood are the five characteristics of a well-prepped surface. Download Restoring the Dream, Sashco’s complete guide to log home refinishing and maintenance for details on these five factors and other keys to a successful and long-lasting (read: let’s not ever do a restoration like this on our home again) job. Find it at sashco.com/restoration. The second most important factor affecting the longevity of stain is the quantity of stain applied to the wood. Light mist coats will fail quickly, even with the best stains out there. Applying as much Colorfast™ as the wood will accept, while back- brushing and forcing it into the wood, results in dramatically improved performance and longevity of both Colorfast™ and the Sashco stain applied over top. This includes filling any cracks or checks in the wood with stain! The first coat is the only time Colorfast™ can penetrate into the wood. See proper staining in action! Watch the video at http://bit.ly/1BOuB7L


Questions on maintaining the legacy of your wood structure? Give us a call- 1-800-359-6614

Pickup in store - or ship to your door -in whichever woods your cabin dwells.

 Schroeder Log Home Supply, Inc. 

1101 SE 7th Avenue

Grand Rapids MN 55744

1-800-359-6614 


Wednesday, August 14, 2024

Applying Log End Seal by Perma-Chink

Log End Seal 1-gal


Log End Seal by Perma-Chink protects exposed log ends from deterioration from the elements. Log End Seal is a clear finish that helps to keep water from penetrating into the log ends and provides a durable layer of protection against sun, wind, and weather damage. Even if the log ends are coated with quality stain, the exposed grain of the wood acts like small straws drawing water into the log. This gives rot and decay an opportunity to start. If left unprotected, log or log corner replacement may eventually be required.

To apply, thoroughly sand all exposed log ends, taking care not to leave heavy sanding marks or gouges. Apply any Lifeline™ brand exterior stain to the entire home, including the log ends. When the Lifeline stain has dried, apply one coat of Log End Seal with a brush, pad or trowel taking care to completely cover the exposed log end. Try to avoid leaving brush marks or uncoated areas on the ends. Wipe off any excess that may have worked its way onto the sides of the logs. Let the Log End Seal dry and finish with a Lifeline topcoat over the entire home. Wash equipment and brushes with soap and warm water. Dried Log End Seal may be removed with alcohol.

Log End Seal is a product unique to Perma-Chink Systems. Although Log End Seal is a fairly simple and easy product to use there are some tips that can help you avoid problems especially in the fall when cooler temperatures slow down the curing process. The most important thing about applying Log End Seal is that it needs to go on in one thin coat. In order to attain a thin coat the log ends need to be sanded fairly smooth. If they are not smooth the rough surface texture will prevent a thin coat application and the thicker the film, the longer it will take to cure. One of the characteristics of Log End Seal is that it stays white until it is fully cured and if it gets wet during the curing process the white color can last for several weeks. If Log End Seal is applied in a thick coat and gets wet it may take several months for it to become completely clear and transparent. This is the most frequent cause of complaint from our customers. Eventually it will cure and become clear but in the meantime the log ends on your home will have a white haze.

Choosing the right application tool can help prevent applying too thick a film. Rather than using a standard paintbrush, a paint pad or sponge brush works well. Since Log End Seal is thick and viscous, some people prefer to apply Log End Seal with a wide blade trowel. Any of these tools will work as long as the Log End Seal is applied in a thin coat. When applied correctly one gallon of Log End Seal goes a long way. One gallon covers 30 to 40 square feet which equates to 100 eight inch diameter log ends or 180 six inch diameter log ends.


Questions on maintaining the legacy of your wood structure? Give us a call- 1-800-359-6614

Pickup in store - or ship to your door -in whichever woods your cabin dwells.

 Schroeder Log Home Supply, Inc. 

1101 SE 7th Avenue

Grand Rapids MN 55744

1-800-359-6614


Tuesday, August 13, 2024

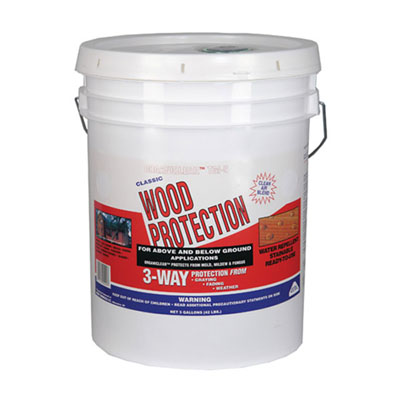
Applying Organiclear TM5 First Treat

TM-5 First Treat

 Organiclear™ TM-5 First Treat wood coating is used to protect newly debarked (green) logs and timber during processing, storage, and delivery. TM-5 First Treat protects against Mold, Mildew, and Fungus and three way protection from Rain, Fading, and Weather. (Optimal protection is afforded against discoloration from UV rays.) The special one-coat water based formulation penetrates deep into the interior of green wood. TM-5 First Treat is a concentrate that can be diluted with two parts water, or 1:1 for high moisture woods such as Norway Pine or Aspen. TM-5 First Treat is designed for dipping, though spraying works well. If you choose to dilute at 2:1, it may require monitoring logs for additional coatings.

TM-5FT (First Treat) Aqueous Penetrating Wood Coating

Fresh Wood Commercial Applications

Product Description

  • For handcrafted or machined logs and timber, use Organiclear™ TM-5FT wood coatings to protect newly debarked (green) logs and timber during processing, storage and delivery. Standard Tar Products' special one-coat water based formulation penetrates deep into the interior of green wood. Optimal protection is afforded against discoloration from UV rays.
  • TM-5FT offers similar features as our ready-to-use TM-5 finish, but it is formulated as a water-dilutable material for maximum cost efficiency and economy in commercial use.

Sawmill and Diptank Users:

  • TM5-FT is specifically formulated to be effective on freshly cut, newly debarked wood.  
  • Treatment should be applied immediately (within 24 hours) to protect logs from deterioration and damage that can occur from UV rays, rain and moisture during storage and processing.

Dilution Directions:

  • Organiclear's™ TM-5FT for commercial use is packaged as a water dilutable treatment.
  • The suggested dilution is two (2) parts water to one (1) part Organiclear™ TM-5FT (2:1).
  • Sawmills and exporters who require greater protection may require less dilution.
  • Refer to product label for dilution instructions.

Dipping Instructions:

  • Carefully empty TM-5FT into the diptank.
  • Add the total amount of water at the proper ratio (2:1 or less).
  • Logs or lumber should be totally immersed to ensure that all wood surfaces are completely treated.
  • For best results, soak lumber for five minutes or longer for each inch of thickness.

Drying Time:

  • Allow 12-24 hours for drying, depending upon the temperature and humidity.

Proper Clothes In Handling:

  • To protect against skin irritation, always wear a long-sleeved shirt, long pants and goggles.
  • Also use an OSHA approved mask to protect against inhaling the vapors.
  • For your information and safety, please take the time to read the product label carefully before use.

Packaging:

Available in 1,5,and 55-gallon containers. The most convenient container for diptank applications
will be 55-gallon drums. 


Questions on maintaining the legacy of your wood structure? Give us a call- 1-800-359-6614

Pickup in store - or ship to your door -in whichever woods your cabin dwells.

 Schroeder Log Home Supply, Inc. 

1101 SE 7th Avenue

Grand Rapids MN 55744

1-800-359-6614

Mold and Mildew

Technical Tip from Perma-Chink Systems, Inc Mold and mildew are terms that are used interchangeably since they refer to the same living orga...