STEP #1: INSPECTION
If applying to an older home, check for signs of rot and decay. Remove and replace or repair deteriorated wood. Contact any Perma-Chink Systems office for information about wood repairs.
STEP #2: SURFACE PREPARATION
All surfaces should be clean, dry and free from oil, dirt or other foreign matter. Use appropriate materials to clean and prepare surfaces. Perma-Chink Log Home Sealant is best applied after the home has been stained. We strongly recommend the use of any LIFELINE™ brand exterior stain and topcoat. If an oil-based stain has been applied, allow it to dry at least two weeks before applying Perma-Chink Log Home Sealant.
STEP #3: BACKING MATERIALS
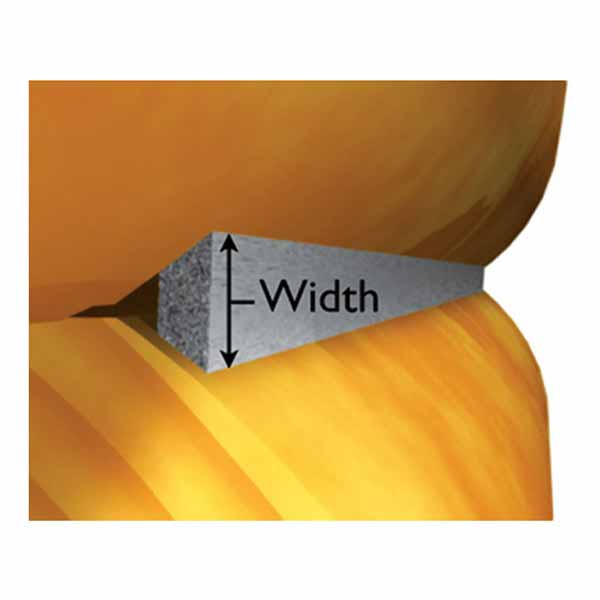
Perma-Chink Log Home Sealant should only be applied over approved substrates. When selecting the width of Grip Strip to use on round logs, the joint width should be approximately 1/6 the diameter of the logs (10” diameter logs; 10” ÷ 6 = 1.67”). Obtain a copy of our “Log Home Sealant Application Guide” from any Perma-Chink Systems location for information about suitable backing materials and substrates.
STEP #4: APPLICATION
Do not apply in direct sunlight or when the temperature is less than 40° F. Perma-Chink Log Home Sealant may be applied with a bulk loading caulk gun, grout bag or high volume chink pump. Hold the applicator tip firmly against the back surface and apply. If several beads of chinking are required to fill a gap, place them close together to avoid entrapped air. Apply enough sealant to maintain a wet thickness of
at least 5/16” and no more than ½” across the entire joint after tooling. Only apply as much sealant as you can tool in about 15 minutes. Once the joint is filled, spray with a light mist of water and tool smooth with a trowel or spatula. If the width of the trowel is close to the width of the joint, the smoothing process will be easier. Make sure there is good contact between the Perma-Chink and the exposed edges of the top and bottom logs. If you are a first time applicator, start work on a less visible area until you become familiar with the process.
STEP #5: DRYING AND CURING TIME
Protect freshly applied Perma-Chink from direct rainfall for a minimum of 24 hours. When draping a wall with plastic film, allow some airspace between the wall and the plastic to facilitate drying. Sheets of cardboard may also be use to cover newly applied Perma-Chink to prevent “chinking inspectors” from leaving finger dents in the uncured chinking. Drying time and curing time are two entirely different terms. In warm or hot weather, Perma-Chink will begin to skin over in as little as ten minutes while a complete cure may take three to four weeks. Cooler weather will slow both the drying time and curing process.
STEP #6: CLEANUP
Clean area and equipment immediately with warm, soapy water before the Perma-Chink dries. For removing Perma-Chink that has dried, soften with alcohol and then clean with warm water. Please do not pollute our environment. Dispose of containers and unused material in accordance with local, state, and federal regulations.
STEP #7: MAINTENANCE
Periodic cleaning with an appropriate cleaner such as Log Wash™ will clean off dust and dirt and accentuate the beauty of your home. We recommend that log walls be washed down at least twice a year. Small rips and tears may be repaired using a bead of Perma-Chink and a damp short bristled brush to blend it in with the surrounding area. Tears greater than one foot long should be cut out and the chinking replaced.
STEP #8: STORAGE
Store Perma-Chink out of direct sunlight and protect from freezing. Although Perma-Chink is freeze-thaw stable, if the product is accidentally frozen, allow to thaw, mix well and check for suitability of use before applying. Request a copy of our “Log Home Sealant Application Guide” from any Perma-Chink Systems office for additional information about applying and maintaining Perma-Chink Log Home Sealant.
Questions on maintaining the legacy of your wood structure? Give us a call- 1-800-359-6614


No comments:
Post a Comment