Wednesday, March 22, 2017

End Grain Protection for Logs

Trees are living, breathing organisms. Even after they die and are used in construction as logs and timbers, they continue to function as living, breathing structures. The cell structure of wood is designed like a bundle of straws, perfect for channeling water, nutrients and other things critical to the life and processes of the tree. When the tree dies, however, that structure remains. The 'straws' are still there and they will still suck up water and channel it just as designed to do. This is why in order to protect logs and other wood structures, it is important to protect the exposed end grain and prevent the 'straws' from sucking up moisture, which will lead to rot. Wood is a strong, renewable, environmentally-friendly, and all around excellent material for building. The key to its longevity is to keep it dry so that it will last for centuries. A major key to keeping it dry is protecting the end grain.

Several ways to effectively protect the end grain on log and timber structures is in design considerations, borate and stain saturation, end grain sealers, and physical barriers like decorative caps and post jacks.

Design Considerations
The most important consideration for protecting wood from decay is in design. Long roof overhangs are well worth the extra cost in the protection they give to logs and timbers. Log ends should not jut past the roofline or sit in the path of a dripline. Although timbers reaching past a roofline may look neat, design should follow function, and leaving the end grain exposed to prolonged moisture exposure is a formula for decay.

One easy way to help protect end grain from prolonged moisture exposure is to profile horizontal logs with a back-slanted cut. An angle of cut that leaves end grain facing upward will collect water and channel it back into the log. A straight vertical cut would be preferable. Even better would be a profile that slants backward so that the end grain is protected under the overhang of the log itself, in addition to the roof protection.


The design of post placement is also an important consideration. Moisture doesn't only come from above as rain, but it can be absorbed from below as moisture from the ground or as sitting rainwater on the slab. Log or timber posts that sit right on the slab will suck up water like a straw and quickly lead to decay. Protecting that end grain with a sealer, a sill seal, and/or even better with a vertical lift, and the log post will last indefinitely. Vertical life can come from post screw jacks or even stone or concrete footings with a moisture barrier between.


Saturation with Borates and Stain/Finish
Regardless of how the end grain will be protected, first saturating the raw wood with a copper preservative or borate preservative (such as PeneTreat or ArmorGuard) will provide rot protection in the wood in case of moisture exposure. Additionally or alternatively for log or timber ends that might be in high risk due to moisture exposure, concentrated preservative rods like Bor8 Rods or Cobra Rods are also an option.

To block the absorption of moisture into the wood, it's beneficial to saturate the end grain with whatever stain or finish is being used on the rest of the home. This can be soaked into the end grain to the point of refusal so that being saturated with the resin and solids of the stain, it will not be able to take on water so easily in the future.

End Grain Sealers
In addition to saturation with the stain/finish being used on the rest of the log surface, some opt to give the end grain and additional layer of clear coat protection with an end grain sealer. This could be just an extra later of the top clear coat from the stain system being used, or it could be a sealer designed specifically for end grain. Two options available on the market are oil-based Log-Gevity End Grain Sealer or water-based Log End Seal.

Sedona Post CapTiara Post CapDecorative Caps
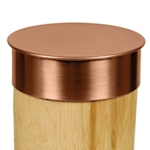
Decorative post caps are a popular choice for vertical posts. Both functional as well as aesthetic, decorative caps, such as copper post caps, are a way to protect the upward-exposed end grain while also adding an accent to wood structures.


Sill Seals and Jacks
Protecting the bottoms of vertical log and timber posts is important so that they don't wick up water from the ground or concrete slab. A closed cell sill seal is one way to do this. Post screw jacks also help keep the bottoms of the post from wicking moisture, while they also allow vertical posts to settle with newly constructed log walls.
Screw Jacks
By protecting the end grain from water and taking other precautions to keep moisture out of the wood, log and timber structures can last centuries to come. Contact Schroeder Log Home Supply, Inc. with any questions about protecting the end grain of logs and timbers.

Questions? Give us a call at 1-800-359-6614 or contact us through our website here.
Schroeder Log Home Supply, Inc.

Monday, March 20, 2017

Chinking Damaged by Birds

Reprinted from our LogCore Newsletter Spring 2008 edition and The Log Home Maintenance Guide


You can see where birds have pecked irregular shaped holes into the latex chinking looking for insects and even where they chewed into the backer rod.

Birds can hear the insects moving within the log work and they are trying to reach them. The insects have either found within the logs soft, moist wood to nest in and hatch their young or are feeding on the wood itself.

Treatment:
The insect infestation of the logs needs to be treated first. Look for other small holes (accompanied by fine sawdust) in the log work. Using a syringe, inject the holes with an approved insecticide. Plug the holes with caulking or a mixture of wood glue and sawdust. For more information on the prevention and treatment of insects see Chapter 4: Insects starting on page 30.

Once the insect problem has been dealt with, fill holes with similar caulk or chinking to seal them from future infestation and moisture infiltration.

Unlike mortar chinking, synthetic caulk and chinking will adhere perfectly to old caulk or chinking as long as the surface is dry and free of dust and debris. Apply a small amount of new chinking over the holes and spread out with a foam brush to form a seamless patch.

Monitor the chinking and logs over the next few months to see if any more holes materialize. If so, repeat the treatment until they stop appearing. Typically, once the insect problem has been effectively dealt with, the birds should leave the chinking alone.

Reprinted from the Log Home Maintenance Guide.

Questions? Give us a call at 1-800-359-6614 or contact us on our website here.

Sunday, March 19, 2017

Applying Lifeline Finishes Over Penetrating Oil-Based Stains

By Perma-Chink Systems, Inc.
Reprinted from our LogCore newsletter Summer 2014 edition

We often get asked if it is acceptable to apply a Lifeline finish systems over an existing oil-based stain. It would be nice if there was a simple yes or no answer to this question but there’s not. It depends on a number of factors including how many coats have been applied, how long the stain has been on the walls and which oil-based stain are we talking about. In general it is ALWAYS best to remove an existing competitive finish before applying Lifeline. All too often a homeowner has no idea what is on the walls let alone how many coats were applied. What they do know is that they want to apply something on top of what’s already there to avoid the cost and effort of stripping the surface down to bare wood. This approach is very risky, especially with a water-based, high performance film-forming finish like Lifeline. Let’s look at some of the individual parameters that have to be dealt with.

Appearance: Perma-Chink’s Lifeline stains are transparent finish systems. This means that any discolorations or residual pigmentation that remains on the wood will show through our finish systems. With few exceptions our finishes have little or no hiding power. Once our Lifeline system has been applied it essentially locks the surface of the wood in place and if you are dissatisfied with the final look and appearance it can be quite costly and time consuming to remove the finish, take care of the discolorations, and start over again
.
Adhesion: How much residual oil still remains in the wood and is it enough to interfere with the adhesion of Lifeline? These are questions that are just about impossible to answer. Yes, a small test area may quickly determine that there is a problem but if a problem does not show up within a few days there is no way to tell what may happen over a period of several months or years. We have seen several issues that were directly attributed to the prior application of oil-based stains. Peeling occurred around checks and fissures because they had been flooded with an oil-based product during the initial staining process and although most of the oil had evaporated from the surface of the logs the checks had retained enough oil to reduce the adhesion of a water-based film.

Blisters: When several coats of an oil-based penetrating stain have been applied to a wall within the course of a few years the underlying wood can become so saturated with oil that it may take a long time for it to evaporate. When a homeowner finally decides that it’s time to change to a quality finish like Lifeline pressure washing with water may appear to remove most if not all of the residual oil pigments and prepare the surface for the Lifeline finish. The wood may look clean and bare but in reality the old oil carriers may still be in the top layer of wood. With the application of the first coat of Lifeline these oils are now trapped in the wood. Yes, our finishes breathe water vapor but oil molecules are much larger and can’t make it through the film. Now weather comes into the equation. If the days stay cool and cloudy until the entire finish system is applied and has time to cure there’s a good chance that nothing of consequence will occur. But if the sun comes out and heats up the wall while the finish is still soft and pliable the oils contained in the wood will begin to evaporate creating blisters in the finish.

This can occur after the first coat, second coat, or the entire finish system has been applied. One thing that these types of problems have in common is that they typically show up within a week after application.

If you plan to apply Lifeline after having applied a penetrating oil-based stain what is the best way to minimize the chance of forming blisters? The product to use in these cases is S-100 Finish Remover. S-100’s formulation includes a strong detergent package that will help make the residual oils water soluble and easier to wash away. Once the finish is removed using S-100 allow the surface to remain bare for a couple of months to allow any remaining oil to evaporate. When you are ready to stain, wash the surface with Log Wash, allow it to dry and apply the first coat of Lifeline.
©Perma-Chink Systems, Inc.

Saturday, March 18, 2017

WeatherSeal's Chemistry

By Continental Products Company
Reprinted from our LogCore newsletter Spring 2014 edition

WeatherSeal is different because it is thick when properly mixed. Its color also will appear lighter
and more opaque when initially applied to the wood surface than when it starts to dry. That is because there is water in WeatherSeal which distorts its true color. As the water evaporates from the surface of the applied WeatherSeal, its actual color and transparency is revealed.

To someone who has never used WeatherSeal, it can look pretty scary when first applied. Just be patient, the color will change within hours.

Because of WeatherSeal’s unique chemistry, it applies thick, dries thin. The water makes it puffy. As the water evaporates, the resins, oils, and solvent left on the wood surface thin out and absorb into the wood.

Because WeatherSeal is thicker, more can be deposited on a wood surface than standard thinner stains. Consequently, more WeatherSeal is applied with one coat on a wood surface than can be applied with thinner stains. This fact, plus the confusion about WeatherSeal’s thick chemistry, causes WeatherSeal to be mislabeled as a surface coating and not a penetrating stain. This is not true.
WeatherSeal does penetrate (as much as most competitors, which in reality isn’t all that much anyway) but because of WeatherSeal’s thick chemistry, more (and better) material can be deposited on the surface than the thinner stains, thus allowing more WeatherSeal protection to remain on the surface. For a longer life, and greater protection, the wood surface needs some type of shielding. WeatherSeal does both… it absorbs and it coats.

Applying Weatherseal On Decks
Prior to staining, clean the deck surface with either the bleach solution formula (1 qt. bleach, 3 qts. water, 1/2 cup trisodium phosphate, 2 oz. Dawn® detergent), or a deck cleaner.

Use a deck brush to scrub clean and then pressure-wash (500-750 psi) or hose down completely with a fresh water rinse. Allow to completely dry before coating. If the lumber is green (above 18%) allow to dry 2-4 months before cleaning and coating.

Once the lumber is dry (below 18%), apply 1 to 2 coats of WeatherSeal. Two coats are especially recommended on new uncoated decks. Two coats will provide a more uniform and richer appearance, a longer service life, and better protection. Wait until the first coat is dry to touch (slightly tacky is OK) before applying the second coat. (A second coat will not spread smoothly and evenly over the first coat if the first coat is too sticky.)

On previously stained decks, a thorough pressure wash and cleaning of the stained surface is mandatory. Depending on the type and amount of old stain remaining on the deck surface and its appearance, stripping of the weathered stain to bare wood may be necessary.
Once the final coat is applied and dry to touch, wait 3-4 days (70˚F/21˚C) before gently placing furniture and allowing light traffic and approximately 10 days (70˚F/21˚C) for normal use. (At this point WeatherSeal will still be softer so care should be taken not to drag furniture, walk with muddy feet, let dogs run wild, etc.)

Note: WeatherSeal will not achieve its full hardness for 21-30 days at moderate mid-70˚F daytime temperatures, However, within 7-10 days at these temps, WeatherSeal will achieve 80 - 90% hardness.

Questions? Give us a call at 1-800-359-6614 or contact us through our website here.

Friday, March 17, 2017

Resin Seeping From Sides of Finished Logs


Resin or pitch can seep from logs for years after the logs have been cut and the building finished. This usually happens while moisture is leaving the wood, carrying pitch to the surface. Also, the logs could have been summer cut when they contained more moisture, sap, and pitch. It is always best to cut logs during the winter months or early spring when moisture, sap, and pitch are at a minimum.

Treatment: If the sap or pitch is dry and crystallized it can be scraped off with a metal putty knife or sanded off with an Osborn buffing brush; the remaining residue can be cleaned up with a mild solvent such as rubbing alcohol. If the sap or pitch is still wet, wait until it has stopped running. A cleaning agent like X-180 can be used to remove the wet sap, or let it dry and then clean up with a mild solvent like rubbing alcohol. If you clean it off while it is still wet, it will probably continue to ooze back out over the area you have cleaned. You may want to just let the pitch continue to seep out until it stops before trying to clean it up.

Reprinted from our Log Core newsletter Fall 2016 edition

Questions? Give us a call at 1-800-359-6614 or contact us via our webpage here.

Capture Log Stain by Sashco

  Capture Log Stain by Sashco is a log finish that is extremely effective and attractive semi-transparent stain that is followed by a wea...