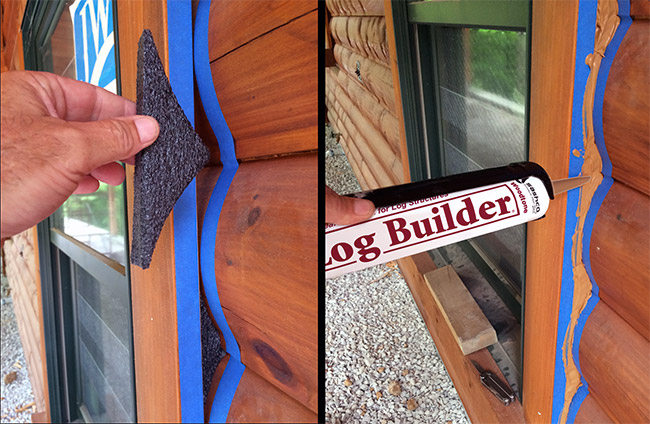
 Log Builder Caulking by Sashco is a log home caulking sealant with a limited lifetime warranty. Sashco Log Builder Caulking is designed to meet the demanding sealant needs log homes and is compatible with most construction materials. Sashco Log Builder Caulking is water resistant in 1-4 hours. Sashco Log Builder caulking has superior water resistance. Plus excellent resistance to UV rays. Sashco Log Builder Caulking develops powerful adhesion, remains a rubbery sealant for many years. Not only does Log Builder caulking have powerful adhesion to sound wood - it sticks to a lot more. Granted, you want your sealant to have superior adhesion to all species of wood, but Sashco Log Builder caulking adheres to a variety of surfaces. After all, your log home doesn't just consist of wood. What about windows, doors, and baseboards made of a different material? Sashco Log Builder caulking sticks to most building materials including glass, plastics, and metals. So you can seal around those windows, doors and baseboards effectively. And you can fill checks and cracks since Log Builder caulking adheres to most log home stains and finishes too. Sashco Log Builder caulking has water-based chemistry that is environmentally friendly. All Sashco caulking including Log Builder Caulking is recommended for use with Backer Rod when used with logs. Made in the USA.
Fundamental Caulking
Application Guidelines
• Proper substrate preparation and application are imperative for product longevity. Read this entire info sheet
(LBR 002) before applying any product.
• Make certain there is compatibility between your
stain and Log Builder. We recommend Sashco’s
Capture®/Cascade® or Transformation Stains® for
exterior applications and Symphony® interior clear
coat for beautiful long-term protection. Best results are
obtained when Log Builder is applied to clean, stained
wood. Call Sashco at 800-767-5656 for guidance if in
doubt.
• Check the weather forecast. Finishing products are
best-applied in moderate weather conditions, i.e., out
of direct sunlight, and in dry, warm conditions..
• Check the log surface temperature. The surface temperature should be between 40˚F (4˚C) – 90˚F (32˚C).
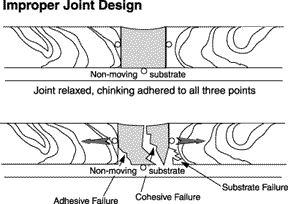
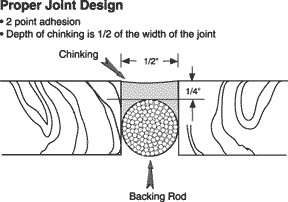
• It is always best to use a bond breaker (usually backer
rod) before caulking. Sashco strongly recommends the
use of backer rod, especially if the home is new and/or
the logs are subject to significant movement. If a bond
breaker is not used, expect more caulking repairs.
• Tool Log Builder to help ensure good contact with the
log surfaces, especially to the upper log; this will greatly aid adhesion.
• Ideal sealant depth is 1/2 of the joint width, but no
less than 1/4” and no more than 1/2”.
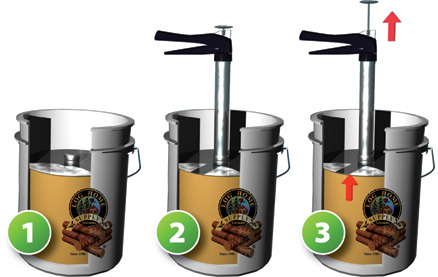
• Assemble tools and equipment:
- Backer rod
- Caulking guns
- Trowels, spatulas, or foam brushes for tooling
- Clean water and rags
- Plastic sheets to cover the caulking if wet
weather moves in
- Staple gun & staples
Surface Preparation
Best results are obtained when Log Builder is
applied to wood that has been previously coated with
a compatible and thoroughly cured stain. In fact, Log
Builder has a Limited Lifetime Warranty when applied
over any of Sashco’s stains: Capture Log Stain or
Transformation Stain.
If not using a Sashco stain, be sure to confirm its
compatibility with Log Builder. If the stain is older
but still intact, clean the log surfaces thoroughly to
remove dirt, pollen, bird droppings, and other
surface contaminants.
The USDA Forest Products Laboratory and other
researchers around the world have recently reported
that surface wood exposed to sunlight for as little as
1-2 weeks can become significantly damaged and
unsound which may lead to premature adhesive
failure of coatings. Such surface wood damage has
the potential to also hurt Log Builder’s (or any caulk’s)
adhesion. Once bare wood has been properly cleaned
and prepped to remove unsound wood, stain should
be applied as soon as possible. Follow with
Log Building caulking.
A few sealers, especially those high in wax content
or non-drying oils, may interfere with adhesion. Some of
these coatings can hurt any caulk’s adhesion—whether
applied before or after the caulk—so we advise against
their use. Check with Sashco if you have questions about
your particular product.
Questions on maintaining the legacy of your wood structure? Give us a call- 1-800-359-6614
Pickup in store - or ship to your door -in whichever woods your cabin dwells.
Schroeder Log Home Supply, Inc.
1101 SE 7th Avenue
Grand Rapids MN 55744
1-800-359-6614
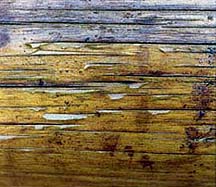
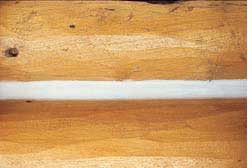
 Lap Marks:
  Carpenter Ants can sometimes be a problem if wood remains moist and wood rot occurs. If they are a problem, treat with
 Outlast NBS 30 is a "Green" Insect Repellent - Naturally Repels: Carpenter Bees, Ants, Cockroaches, Lady Bugs, Dirt Daubers, Wasps, Spiders, Mosquitoes, and other nuisance insects. 100% Derived from Exempt Plant Oils and Components. Mix with Oil or Latex paints/stains or PLAIN WATER

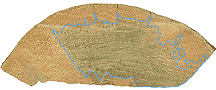
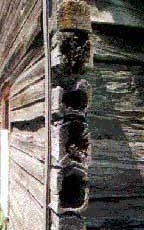 For restoring log ends like the ones pictured and maintaining the natural gray patina of the logs.
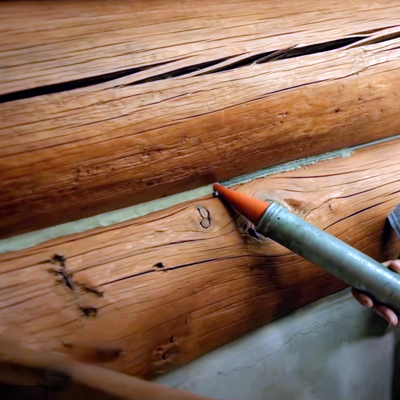

 Tooling
There are as many tooling implements out there as there are chinkers! I
prefer the polyethylene foam brushes available in any hardware store or
lumber yard but I have seen folks tool with rubber spatulas, paint
brushes, putty knives, trowels, and even metal spatulas cut down with
wire cutters to the desired width. The secret is finding the tool that
works best for you. You will also need a pail of clean water, a sponge,
and a spray bottle filled with clean water. To speed up the tooling
process, have several foam brushes on hand. As soon as one picks up too
much chinking and starts to drag instead of gliding over the surface,
throw it into the water pail and continue on with a clean brush. A
mixture of 1 part denatured alcohol to 2 parts water can be used for
misting chinking when the temperature is over 70°. If you are working in
the sun and the chinking is skinning over too quickly, straight alcohol
can be used. When the temperature is lower than 70° the alcohol is not
necessary.
Tooling
There are as many tooling implements out there as there are chinkers! I
prefer the polyethylene foam brushes available in any hardware store or
lumber yard but I have seen folks tool with rubber spatulas, paint
brushes, putty knives, trowels, and even metal spatulas cut down with
wire cutters to the desired width. The secret is finding the tool that
works best for you. You will also need a pail of clean water, a sponge,
and a spray bottle filled with clean water. To speed up the tooling
process, have several foam brushes on hand. As soon as one picks up too
much chinking and starts to drag instead of gliding over the surface,
throw it into the water pail and continue on with a clean brush. A
mixture of 1 part denatured alcohol to 2 parts water can be used for
misting chinking when the temperature is over 70°. If you are working in
the sun and the chinking is skinning over too quickly, straight alcohol
can be used. When the temperature is lower than 70° the alcohol is not
necessary.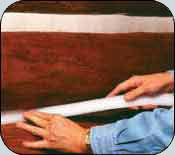

