Monday, January 6, 2025

Sansin Announces Color of the Year 2025 - Ivory 21

Sansin has announced the 2025 color of the year: Ivory 21.

Ivory 21 enhances the natural beauty of wood and brightens up any space. This versatile white hue works with any aesthetic – from timeless traditional to Nordic minimalist and coastal tranquil.

MJMA | Scott Norsworthy

“Natural, translucent colors like Ivory are trending as building owners, contractors, and architects seek finishes that protect the wood while highlighting its personality and allowing the character of the wood to shine through.”

Sjoerd Bos, Managing Director – Sansin Corporation


Ivory is available in several of Sansin’s environmentally friendly and low VOC premium wood protection systems, including:


https://www.loghelp.com/products/sansin.asp


Questions on maintaining the legacy of your wood structure? Give us a call- 1-800-359-6614

Pickup in store - or ship to your door -in whichever woods your cabin dwells.

 Schroeder Log Home Supply, Inc. 

1101 SE 7th Avenue

Grand Rapids MN 55744

1-800-359-6614
 

Thursday, December 19, 2024

What is the R-Value of a Log Wall?


  1. Wood has a thermal transmission factor, called k. It is used in calculations to generate the R-value of an assembly, but only certified insulation products have specific R-values. The U.S. Department of Energy (DOE) rates an Eastern White Pine log at R-1.42 per inch which might mean an 8” log would be R-11.4, but that’s not the whole story.

  1. Home Energy Raters do not take into account the thermal mass value of a solid wood assembly.

  1. The DOE has issued a grant to Oak Ridge National Laboratory (ORNL) and the International Mass Timber Alliance (IMTA) to research the energy conserving properties of mass timber. Mass timber can be solid wood like logs and timbers, or laminated wood like glue-lam beams and cross-laminated timber panels.

  1. Work done at the ORNL in Tennessee has proven the following:

    1. A 7- inch thick mass timber wall is 22% more efficient than a stick built structure with R-19 insulation.

    1. Improved thermal comfort with thermal mass (up to 46% fewer uncomfortable hours due to convective air flow). Thermal comfort is the condition of mind that expresses subjective satisfaction with the thermal environment.

  • Lightweight assemblies (stick built structures) respond over a short time to temperature changes both inside and outside.

  • Mass assemblies (Log, concrete, brick) respond slowly to changes not only in temperature, but relative humidity. Since mass absorbs and radiates heat and humidity, it tempers the indoor environment.

    1. Peak demand was up to 50% lower with mass wood depending on the month and location.

An example of peak demand is everyone coming home from work at the same time and turning the air conditioning on.

  1. IMTA efforts are continuing as they are building three pairs of 3-meter cubes, one stick built and one of mass timber.

A pair of cubes are set up in Tennessee with more in Texas, and Colorado to replicate a more operational environment.

Over a 2- year period, constant temperature monitoring will take place. The data from these cubes will be used to prove the computer simulations used to design the cubes. The simulations will then be used to generate new thermal codes for mass timber walls.


The IMTA is a not-for-profit, charitable organization that promotes Mass Wood Construction and sustainability, energy efficiency, low embodied energy, and carbon sequestration, by the following engagements.

  • Identifying barriers which challenge the use of mass wood construction in residential and commercial applications.
  • Pursuing scientific research and testing in collaboration with post secondary institutions, government, and non-governmental organizations.
  • Disseminating data pertinent to the development of building codes and energy standards that reflect woods value proposition.


Monday, August 26, 2024

Sansin Dec Finish


Sansin Dec Finish is a two-coat, specially designed formulation for decks, docks, and balconies. The modified natural oils in Sansin Dec Finish penetrate deep into the wood with the kind of variable moisture content frequently found in decks. Although high in solids, the Sansin Dec Finish formula does not leave a thick film on the surface but remains breathable and easy to maintain. Provides excellent UV and weather protection and will not crack, peel, or blister. It is the natural solution for maintaining the beautiful aesthetics found in wood. Made in Canada.

PREPARATION IS KEY TO A SUCCESSFUL PROJECT

• Inspect wood surfaces for defects and make any necessary repairs.
• Use Sansin cleaner and/or wash the entire surface with a minimum 3000 PSI pressure washer use clean water.
• Sand the surface well using a 60-80 grit paper and a variable speed orbital sander.
• Follow by power washing, vacuuming or using compressed air for proper cleaning. Surface must be clean, free from dust, dirt, grease, wax or any existing coatings.

APPLICATION METHODS

• Always flood the surface to the point of saturation
• Dipping
• Brushing
• Flood coating
• Spraying – hand or automated spraying (low pressure or airless)

WORKING PROCEDURE

• Stir well before and during the application process.
• Test formula on an inconspicuous wood surface to ensure proper color and penetration.
• Apply in proper conditions: Ideal temperature of 21°C (70°F) and relative humidity of approximately 50%
• Do not apply if rain or near freezing temperatures are expected.
• Saturate the wood surface.
• Brush out any puddles and runs and level the finish.
• Do not apply on wood that is warm to touch.
• Do not apply in direct sunlight.
• Continually check the surface; wipe up all puddles and brush out runs. 

MAINTENANCE

Horizontal surfaces require maintenance every 1-4 years. Maintenance is necessary when the surface shows signs of wear, such as fading or erosion. Maintaining your wood on a regular basis will ensure
long-lasting color retention, exceptional dimensional stabilization and effective water repellency. Periodically, clean the wood surface with a power washer or Sansin Multi-Wash to remove dirt and residue. How frequently maintenance coats are required will depend on the quality of prior preparation, quality of application and exposure levels. If fading or erosion is evident, prepare wood by using a power washer to lightly clean the wood surface; or use Sansin Multi-Wash. Then re-apply one maintenance coat of Sansin DEC according to instructions. Exposure, workmanship and color will affect the performance of the coating.

STORAGE

Shelf life when stored in ideal conditions is 18 months. Store at a temperature of between + 10ºC and + 30ºC (50ºF and 86ºF).
Keep containers tightly closed.


Questions on maintaining the legacy of your wood structure? Give us a call- 1-800-359-6614

Pickup in store - or ship to your door -in whichever woods your cabin dwells.

 Schroeder Log Home Supply, Inc. 

1101 SE 7th Avenue

Grand Rapids MN 55744

1-800-359-6614

Sansin DEC Deck Finish & Topcoat

Thursday, August 22, 2024

Log Home Caulking, Chinking, & Sealing FAQs

 Can I stain before caulking or chinking?

When applying water-based caulk and chinking like Conceal, Energy Seal, Log Builder caulking, Log Jam chinking, or Perma-Chink, and using a water based stain, it may be applied before of after staining. If using oil-based finishes like NatureColor Base or Recoater, Woodguard, or WR-5:
1. Apply caulk or chinking over one coat, and then apply a second coat of finish the following year.
2. Wait at least 21 days after staining before caulking or chinking to allow for cure time. (Paraffinic oils like in X-100 can cause adhesion failures.)

Do I need backer rod?

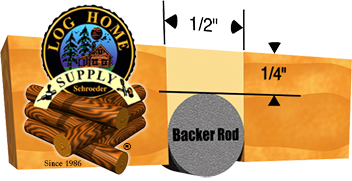
Yes, if chink joints are greater than 1/4". See Backer Rod and Chinking.

What does the temperature need to be to apply caulk or chinking?

See "Surface Preparation".

What can I use to smooth out my caulking or chinking?

People use various kinds of "tooling" devices. The most popular would probably be a spatula of some sort at the desired width. Some people use a cake spatula if an industrial one is not available. Butter knives, rubber spatulas, and foam brushes have also been used.

How do I prevent blisters from forming in log home caulk and chinking?

Click here for details.

I have flat on flat logs, what do I put between them?

There are a couple of alternatives to put in between logs for a flat on flat system:

1. The first is to lay a bead of adhesive caulking on each side of the log; see Conceal or Woodsman Caulking.
2. The other alternative is a product called LogSeal. Some of the features of LogSeal are sealing against water, cold, heat, light and noise. LogSeal has adhesive on one side with an easy-release protective liner, providing fast and easy placement during construction. LogSeal provides easy application for flat on flat and saddle notch systems. When using for flat on flat construction, lay one line of LogSeal on the outer edge and one line on the inner edge.

Do I need to caulk after using LogSeal?

Yes. It is always important to seal the exterior side with log home caulk or chinking to keep moisture (in the form of rain or splash-back) out from the log joints. The log caulking also helps to keep insects from working their way in.

Should I buy a 5-gallon pail or tubes?

Economically, it is better to buy a 5-gallon pail; however you don't start saving money until you purchase two 5-gallon pails because of the cost of tools for pail application. A 5-gallon pail is equivalent to twenty-two 29 oz. tubes. It will also depend on what the you feel comfortable with, caulking tubes or a bulk loading gun.

If I buy a 5-gallon pail, how do I get it into my caulk gun?

By using a Follow Plate.

How do I clean and take care of my Albion bulk loading gun?

See "Care of Albion Bulk Loading Guns".

How to Prevent Blisters in Caulk and Chinking

Occasionally, blistering of a chinked or caulked surface occurs. A chinked area is more susceptible to blistering due to the larger joint size. After several years of investigation, Sashco Sealants has uncovered most or all of the causes* of this problem and can recommend ways to prevent it.* At first it was thought that the chinking itself was to blame. But the facts do not support this. For example:

  •  The same batch of product has blistered on one log and not on another.
  •  It is common to find blisters on one side of a house and not the other.
  •  Blisters occur above a certain point on a wall and not below it.
  •  Some blisters appear to be random on a chinking line and others are in a straight row.
  •  Blisters often reappear in the same place when repaired with the same batch of chinking or even with a different batch.

The Causes are Site related and not product or batch related.

Causes of Blisters: The basic cause of any blister is a build-up of gas between the log, the backing surface, and the chinking or caulking. It occurs during The early curing stages when The chinking is soft but has a skin formed on the surface. Heat usually in the form of direct sunlight causes the gas to expand. As the gas expands, it pushes the chinking out, causing a "bubble" or blister. This gas comes from water, wood sap, or even backing material.

What Circumstances Create the Gas? Trapped Water Vapor. As chinking and caulking dries, it gives off water vapor. Any physical condition which traps the resulting water vapor could cause a blister, especially if the logs and chinking are heated by direct sunlight here are some things that could trap this vapor.

  • Cracks or indentations in foam or polyethylene backer rod which doesn't go all the way through. Even tiny spaces can trap enough vapor to create a blister big enough to see.
  • Air bubble trapped during the application process against non-porous backer material.
  • Dead-end crack in wood where moisture vapor can accumulate and expand when heated. (This, most likely, is the most wide-spread cause.)

Note Manus-Bond Caulking is not affected by water vapor in the same as other caulking or chinking because it is a polyurethane. Moisture makes it set up faster and will not generally cause blistering.

.

blisters forming

blisters on day 1 and day 2

Backing Material Backer rod out-gassing. Closed cell backer rod has a puncture and is squeezed by expanding logs. The gas used to make the rod forces a blister in the chinking and caulking.

On Day 1 the backer rod and sealant are applied in the cool part of the day. On Day 2 the sun comes out and heats the logs. This causes the backer rod to be squeezed, and forces a small amount of gas in the backer rod to leave the rod at a rupture or weak spot and make a blister in the sealant. The phenomenon has been known to occur in the caulk and sealant industry for many years and occurs randomly and unpredictably.

Backer Rod Blister

Blister from Pitch PocketPitch Pockets Logs often have what is termed "pitch pockets." These are areas of concentrated pitch, or sap, sometimes containing several gallons! (Pitch pockets of 50 or more gallons are known!) This sap (or its vapor) will follow cracks in logs, coming out of the log almost anywhere. It especially exits at the knots Where the sap flow was directed during the life of the tree. Sap has a volatile component and, when heated, forms a gas that causes blisters. Some blisters appear to be in the dead center of the chinking/ caulking. Upon close investigation, however, most or all of the bubbles are connected to a crack in the log surface. The blisters are often the result of sap vapor, which can come through the tiniest of holes in the wood. Pitch pockets are often the cause of blisters, which line up in a straight row. They are simply aligned with the crack in the log along which the sap is traveling. In the heat of direct sunlight some of the liquid sap in the pitch pocket turns into a gas that is under pressure and can form a blister as it tries to escape the log.

Prevention of Blisters Some of these causes cannot be controlled. Two factors can be partially controlled - heat and backer rod selection/preparation. Since heat normally is responsible for turning undetected gas into unsightly blisters, it makes sense to control this element as much as possible. Once the chinking and caulking has become firm, it can then resist the low pressure from the water or sap vapor and the blisters can then be prevented.

Control the Heat to Prevent Blisters

Control the Heat:

  • Chink or caulk on the shady, cool side.
  • Protect walls from direct sunlight for a few days by covering with a light colored tarp, cloth or plastic. Leave plenty of room for ventilation. It is important to cover the logs as well as the chinking and caulking so the entire surface will stay cool.
  • Stain logs first. This can help to close some pitch pocket holes before chinking and caulking.
  • Although rare, it is possible for excessive heat to build up inside a log home during the early curing stage and cause blisters. If this could occur, make sure windows and doors are left open to allow cool air to ventilate the interior.

Control the Backing Material:

  • Use blunt tools to install closed cell backing materials, being careful to avoid puncturing or denting.
  • Open cell backer rod** may be used in place of closed cell backer rod. These backer rods will not generate gas and they can help dissipate any gas originating from another source. **The weakness of this type of backer rod is that it is more susceptible to absorbing moisture if the chinking or caulking is ruptured and driving rain is forced through to the backer rod.
  • When chinking and caulking over flat insulation (styrofoam, bead board or foil-faced foam board), surface cracks, holes, or dents should be covered with a high quality sticky mylar tape, 2" wide preferably. (The tape will tend to prevent as much as 80% of the blisters that would otherwise form.) Extruded styrene foam (such as Dow Chemical's blue "Styrofoam") has a greater tendency to cause blisters than white bead board or foil-faced urethane foam.
  • Fixing a BlisterA fresh blister can sometimes be eliminated by puncturing the surface skin (to let the moisture vapor escape) and pushing the chinking and caulking back into place. This step can cause marring of the chinking finish, but can be smoothed out 2-3 days later (after the chinking has firmed up) with a small amount of Log Jam applied and smoothed. Often the blister will not reappear. To be effective, this action must be taken within the first day after application, while the underlying chinking and caulking is still wet This method can be the most effective and efficient since the blisters are caught very early (before they become very large) and repaired quickly.
  • More thoroughly cured blisters must be cut off flush and the cavity filled approximately one-fourth to one-half full and allowed to dry. If the cause of the original blister is still present, then it will push the fresh chinking and caulking out into a shallow blister below the surface of the surrounding chinking/ caulking. This may be allowed to dry and a second application, blending with the surrounding chinking, will complete the repair. (See the drawings.)
  • If you can cover a crack or hole with mylar tape, only one repair step is needed. Chinking and caulking can be installed flush with the surrounding material.

Subscribe To Our Log Core Newsletter


Questions on maintaining the legacy of your wood structure? Give us a call- 1-800-359-6614

Pickup in store - or ship to your door -in whichever woods your cabin dwells.

 Schroeder Log Home Supply, Inc. 

1101 SE 7th Avenue

Grand Rapids MN 55744

1-800-359-6614


Thursday, August 15, 2024

Applying Sashco Colorfast

Colorfast Pre-Stain Base Coat

 Everyone knows that color is king on a log home stain job, but pleasing the king can be difficult! Wood porosity differences lead to blotchy, uneven results when staining. UV damage causes the wood to yellow your stain or interior clear coat. That once-perfect color is lost. That’s why you need Sashco’s Colorfast. Colorfast strengthens the glue that binds the wood cells together, called lignin, preventing yellowing of the underlying wood cells to help maintain a consistent color year after year. Before staining, Colorfast evens out wood porosity, creating a smoother surface for stain application and preventing over-absorption and a too-dark color. After staining, the lignin stabilizers prevent the wood underneath from getting sunburned, leaving the stain or clear coat applied on top looking the same year after year. It’s color confidence for your log home. Color: Goes on milky white. Dries clear.

Why use Colorfast™?

• Keeps the color the color: Lignin (wood cell glue) stabilizers prevent yellowing and darkening of the wood itself overtime, which in turn prevent color shifts in the stain applied over top. Light colors stay light and darker colors don’t shift too dark.

• Reduces blotchiness: Fills pores for a smoother surface and more even stain application. Great for blasted, rough-sawn, knotty pine, or milled logs.

• Prevents picture-frame effect on interior wood: Apply on bare wood on the interior of the home and under Sashco’s Symphony ® interior clear coat to avoid yellowing around wall décor.

• Use under any Sashco stain: Using oil-based Transformation Log & Timber? Water-based Capture®, Cascade®, or Symphony® ? No problem.

• Easier stain application: Greatly reduces the need to back-
brush the stain applied over top.

• Great as a log keeper coat: Prevents mold and yellowing due to UV damage on new wood as it moves from the mill to the job site and throughout construction. Contains both mildewcide and algaecide to help preserve the wood until it’s time to stain. Or, life happened and you need to wait for a few weeks between prep and staining? No problem.

• Seal those ends: When applied heavily on log ends, prevents over-penetration of stain and log ends that are darker than the rest of the logs. 

Application Instructions

Exterior Application Instructions

Proper substrate preparation and product application mean greater longevity, a better color, and better long-term performance. Read this full Colorfast™ Info Sheet before applying any product and call Sashco at 800-767-5656 with any project-specific questions.


1. Make sure it sticks: If you are changing from one stain product to another, contact us first. Colorfast™ will adhere to almost any surface that is properly prepped. Any product already on the wood, and especially those that contains waxes, non-drying oils, or silicones, will interfere with the adhesion and penetration of Colorfast™ and must be removed before the product is applied.

2. Clean the surface: Media blast, power wash, or sand wood surfaces using an Osborn ® brush or 60 to 80 grit sandpaper to remove all previous stains and loose, unsound gray or yellow wood fibers, along with mill glaze, pollen, and other surface contaminants. This creates the best surface for Colorfast™ penetration and stain longevity. If mold or algae is present, apply Sashco’s CPR ® in the brightener strength according to the directions or apply fresh bleach in a 4 parts water to 1 part bleach solution. Allow it to sit no more than 20 minutes, then thoroughly rinse. If necessary, use a chemical remover. (Follow label instructions carefully and ensure wood is back to neutral pH, checking with pH strips.)

3. Remove fuzz: For best appearance, remove felting (wood fuzz) with Osborn® brushes, Sashco’s Buffy Pad system or 60 to 80 grit sandpaper once the wood is dry. Remove all sawdust with a broom, compressed air, or a leaf blower, or rinse with water.

4. Apply preservatives: Apply Tim-bor ® according to directions for protection against wood rot and wood-ingesting insects BEFORE Colorfast™ is applied. Allow wood to dry 1–3 days, until wood is at or below 19% moisture content level. (Use a moisture meter to check!) 

5. Timing matters: UV rays from the sun can damage the wood you just worked so hard to prep in as little as 1 week; therefore, Colorfast™ should be applied as soon as possible after wood prep is complete. If cold or rainy weather threaten or delay your staining project, you may apply Colorfast™ and wait up to 8 weeks to apply stain. The mildewcide, algaecide, and lignin stabilizers in Colorfast™ will keep your wood protected during that time. (Score!) Be sure to clean off surface contaminants before staining. If any further sanding prep is needed, remember to reapply Colorfast™ to freshly sanded areas before staining for a consistent finish. 

6. Air and surface temperatures matter: Plan to apply Colorfast™ when air and surface temps are between 40°– 90°F (4°– 32°C). Use an infrared thermometer to check surface temps. Temps that are
too hot dry Colorfast™ too quickly, preventing proper penetration. Temps that are too cold will freeze Colorfast™, preventing both proper penetration and proper curing. 

7. Don’t get caught out in the rain: While Colorfast™ can be stained over as soon as it’s dry to the touch (usually in 2 hours or less). Full cure takes longer. A heavy rain could wash off both Colorfast™ and any stains applied over top, requiring extensive prep to remove the mess and reapplication of the product. Avoid rain both on the day of application and for a full 24 hours afterwards. You may also plan to cover surfaces if rain is expected.

8. Wood must be dry: Use a moisture meter to make sure wood is at or below 19% moisture content level before applying Colorfast™. Damp wood can prevent Colorfast™ from penetrating properly and also increases the risk of water stains, rot, and peeling stain. 

9. Mix it up: Thoroughly mix Colorfast™ with a drill-driven, squirrel-cage type mixer. Scrape any settled material off the bottom of the pail and thoroughly mix it in. Stir Colorfast™ every 15–20 minutes throughout application to ensure all ingredients are always mixed in.

10. Spray it on: Using a large (515+) spray tip on an airless sprayer, apply on one heavy coat of  Colorfast™, covering all the wood and inside cracks and checks. If only a brush is used, be sure to drench-apply Colorfast™ to ensure adequate coverage. Don’t skimp. Colorfast™ goes on milky white, but don’t worry: it dries clear.

11. Lightly back-brush: Using a block brush on a pole, lightly brush out Colorfast™ to make sure all the bare wood gets covered, to catch drips, and to coat the insides of every crack and check. Colorfast™ will soak into the wood completely, so don’t worry about foaming. Any areas that remain wet (white) after 10 minutes should be brushed into drier areas.

12. Dry time: Allow Colorfast™ to dry until clear before applying the final stain over it. Often, this is within 2 hours, but check cracks and checks where it may take longer. 13. Apply stain: Once dry, apply two coats of Sashco’s Capture ®, Transformation Log & Timber, or Transformation Siding & Trim. No matter which stain you use, the first coat will go further, will not penetrate as much, will not require vigorous back-brushing, and will be lighter in color than normal. This is OK! It means that Colorfast™ is working as designed. 

* Do not apply Colorfast™ to fiber cement, concrete, or other cementitious materials.

Interior Application Instructions:

Interior prep is not as intense: Surfaces must still be clean and free of contaminants and loose wood fibers, but media blasting and power washing aren’t required except in extraordinary circumstances (like the home was flooded or was in a fire). A general rule of thumb on interior wood is to prep the wood the
way you want it to feel when finished. On the interior, smoother wood is best and usually desired.

Spray it: Apply Colorfast™ the same way you would on exterior wood. Be aware that Colorfast™ will go further on smooth, less porous interior wood.

Stain it: Cover Colorfast™ with 1–2 coats of Sashco’s Symphony ® interior clear coat for easier cleaning, to maintain the original bright wood color, and add a beautiful satin or gloss sheen. Colorfast™ is formulated to prevent interior wood from yellowing. Hooray! If a color is desired, apply 1 coat of Sashco’s Capture®, or Transformation Siding & Trim in the color of your choice, followed by 1–2 coats of Symphony ®. Download the Symphony ® application instructions at sashco.com/log-home. 

Colorfast Pre-Stain Base Coat
Sashco Colorfast Pre-Stain

What’s Really Important

It is well known by painters and stainers everywhere that the single most important factor in the longevity of any staining or painting job is the quality of the prep done beforehand. Clean, sound, warm, dry, and textured wood are the five characteristics of a well-prepped surface. Download Restoring the Dream, Sashco’s complete guide to log home refinishing and maintenance for details on these five factors and other keys to a successful and long-lasting (read: let’s not ever do a restoration like this on our home again) job. Find it at sashco.com/restoration. The second most important factor affecting the longevity of stain is the quantity of stain applied to the wood. Light mist coats will fail quickly, even with the best stains out there. Applying as much Colorfast™ as the wood will accept, while back- brushing and forcing it into the wood, results in dramatically improved performance and longevity of both Colorfast™ and the Sashco stain applied over top. This includes filling any cracks or checks in the wood with stain! The first coat is the only time Colorfast™ can penetrate into the wood. See proper staining in action! Watch the video at http://bit.ly/1BOuB7L


Questions on maintaining the legacy of your wood structure? Give us a call- 1-800-359-6614

Pickup in store - or ship to your door -in whichever woods your cabin dwells.

 Schroeder Log Home Supply, Inc. 

1101 SE 7th Avenue

Grand Rapids MN 55744

1-800-359-6614 


Wednesday, August 14, 2024

Applying Log End Seal by Perma-Chink

Log End Seal 1-gal


Log End Seal by Perma-Chink protects exposed log ends from deterioration from the elements. Log End Seal is a clear finish that helps to keep water from penetrating into the log ends and provides a durable layer of protection against sun, wind, and weather damage. Even if the log ends are coated with quality stain, the exposed grain of the wood acts like small straws drawing water into the log. This gives rot and decay an opportunity to start. If left unprotected, log or log corner replacement may eventually be required.

To apply, thoroughly sand all exposed log ends, taking care not to leave heavy sanding marks or gouges. Apply any Lifeline™ brand exterior stain to the entire home, including the log ends. When the Lifeline stain has dried, apply one coat of Log End Seal with a brush, pad or trowel taking care to completely cover the exposed log end. Try to avoid leaving brush marks or uncoated areas on the ends. Wipe off any excess that may have worked its way onto the sides of the logs. Let the Log End Seal dry and finish with a Lifeline topcoat over the entire home. Wash equipment and brushes with soap and warm water. Dried Log End Seal may be removed with alcohol.

Log End Seal is a product unique to Perma-Chink Systems. Although Log End Seal is a fairly simple and easy product to use there are some tips that can help you avoid problems especially in the fall when cooler temperatures slow down the curing process. The most important thing about applying Log End Seal is that it needs to go on in one thin coat. In order to attain a thin coat the log ends need to be sanded fairly smooth. If they are not smooth the rough surface texture will prevent a thin coat application and the thicker the film, the longer it will take to cure. One of the characteristics of Log End Seal is that it stays white until it is fully cured and if it gets wet during the curing process the white color can last for several weeks. If Log End Seal is applied in a thick coat and gets wet it may take several months for it to become completely clear and transparent. This is the most frequent cause of complaint from our customers. Eventually it will cure and become clear but in the meantime the log ends on your home will have a white haze.

Choosing the right application tool can help prevent applying too thick a film. Rather than using a standard paintbrush, a paint pad or sponge brush works well. Since Log End Seal is thick and viscous, some people prefer to apply Log End Seal with a wide blade trowel. Any of these tools will work as long as the Log End Seal is applied in a thin coat. When applied correctly one gallon of Log End Seal goes a long way. One gallon covers 30 to 40 square feet which equates to 100 eight inch diameter log ends or 180 six inch diameter log ends.


Questions on maintaining the legacy of your wood structure? Give us a call- 1-800-359-6614

Pickup in store - or ship to your door -in whichever woods your cabin dwells.

 Schroeder Log Home Supply, Inc. 

1101 SE 7th Avenue

Grand Rapids MN 55744

1-800-359-6614


Tuesday, August 13, 2024

Applying Organiclear TM5 First Treat

TM-5 First Treat

 Organiclear™ TM-5 First Treat wood coating is used to protect newly debarked (green) logs and timber during processing, storage, and delivery. TM-5 First Treat protects against Mold, Mildew, and Fungus and three way protection from Rain, Fading, and Weather. (Optimal protection is afforded against discoloration from UV rays.) The special one-coat water based formulation penetrates deep into the interior of green wood. TM-5 First Treat is a concentrate that can be diluted with two parts water, or 1:1 for high moisture woods such as Norway Pine or Aspen. TM-5 First Treat is designed for dipping, though spraying works well. If you choose to dilute at 2:1, it may require monitoring logs for additional coatings.

TM-5FT (First Treat) Aqueous Penetrating Wood Coating

Fresh Wood Commercial Applications

Product Description

  • For handcrafted or machined logs and timber, use Organiclear™ TM-5FT wood coatings to protect newly debarked (green) logs and timber during processing, storage and delivery. Standard Tar Products' special one-coat water based formulation penetrates deep into the interior of green wood. Optimal protection is afforded against discoloration from UV rays.
  • TM-5FT offers similar features as our ready-to-use TM-5 finish, but it is formulated as a water-dilutable material for maximum cost efficiency and economy in commercial use.

Sawmill and Diptank Users:

  • TM5-FT is specifically formulated to be effective on freshly cut, newly debarked wood.  
  • Treatment should be applied immediately (within 24 hours) to protect logs from deterioration and damage that can occur from UV rays, rain and moisture during storage and processing.

Dilution Directions:

  • Organiclear's™ TM-5FT for commercial use is packaged as a water dilutable treatment.
  • The suggested dilution is two (2) parts water to one (1) part Organiclear™ TM-5FT (2:1).
  • Sawmills and exporters who require greater protection may require less dilution.
  • Refer to product label for dilution instructions.

Dipping Instructions:

  • Carefully empty TM-5FT into the diptank.
  • Add the total amount of water at the proper ratio (2:1 or less).
  • Logs or lumber should be totally immersed to ensure that all wood surfaces are completely treated.
  • For best results, soak lumber for five minutes or longer for each inch of thickness.

Drying Time:

  • Allow 12-24 hours for drying, depending upon the temperature and humidity.

Proper Clothes In Handling:

  • To protect against skin irritation, always wear a long-sleeved shirt, long pants and goggles.
  • Also use an OSHA approved mask to protect against inhaling the vapors.
  • For your information and safety, please take the time to read the product label carefully before use.

Packaging:

Available in 1,5,and 55-gallon containers. The most convenient container for diptank applications
will be 55-gallon drums. 


Questions on maintaining the legacy of your wood structure? Give us a call- 1-800-359-6614

Pickup in store - or ship to your door -in whichever woods your cabin dwells.

 Schroeder Log Home Supply, Inc. 

1101 SE 7th Avenue

Grand Rapids MN 55744

1-800-359-6614

Sansin Announces Color of the Year 2025 - Ivory 21

Sansin has announced the 2025 color of the year: Ivory 21. Ivory 21 enhances the natural beauty of wood and brightens up any space. This v...